Hey makeup lovers!
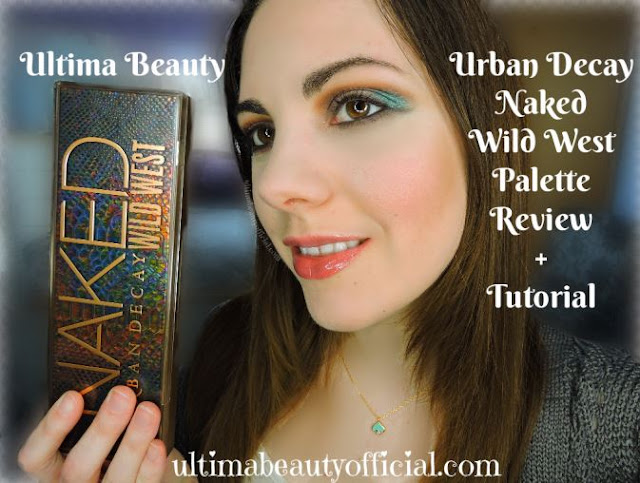
Today I'm reviewing Urban Decay's Naked Wild West eyeshadow palette for you.
Plus I made a tutorial of just one of the many looks you can create with this super versatile palette!
You can check out my video review here
Review & Swatches
There have been several different Naked palettes from Urban Decay throughout the years, but not all of them really caught my eye (I did purchased Smoky and I am still interested in Ultra-Violet).
They were either too similar in shades or too many warm colors for my liking.
But this one caught my eye right away. In this 12 shadow palette there are a good mix of cool toned shadows along with some warmer shades.
And the shade range is close enough that any of the shadows can be worn together, but not too similar that I feel like I am getting an entire palette of one color.
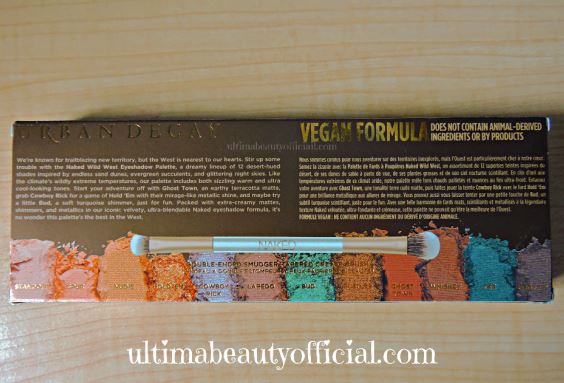
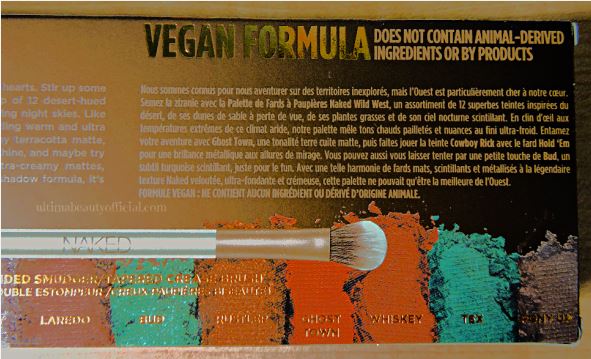
Another super perk of this palette is that the eyeshadows are vegan; they don't contain any animal ingredients or byproducts. So not only are the shadows gorgeous, but you can also feel good about how they were made. 🐾
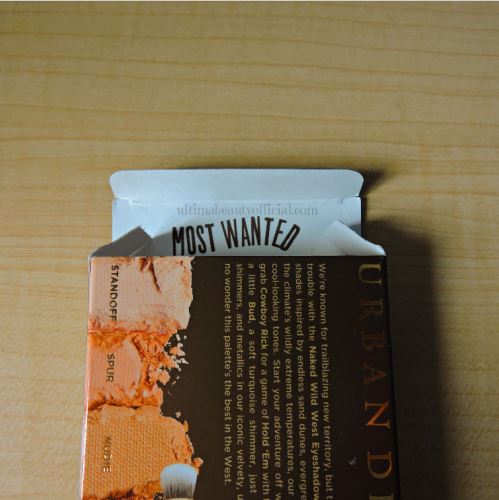
Naked Wild West definitely makes my "Most Wanted" list and I am going to tell you why.
So, giddy up, little doggies (technically dogies) and keep reading for my review and a tutorial (and pathetic attempts at cowboy slang) that you can re-create at home! 🤠
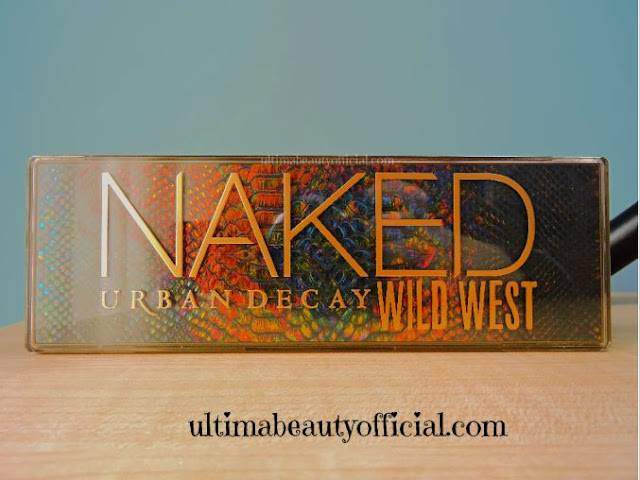
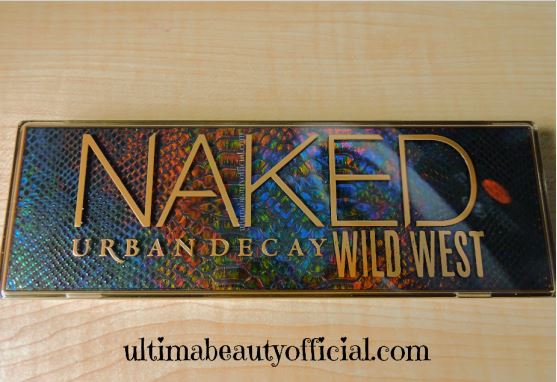
Right out of the gate, I loved the look of the palette. The cool snake skin like texture and rich colors give such a cool old west vibe to the palette. Then you open the palette and...
Howdy, Gorgeous!
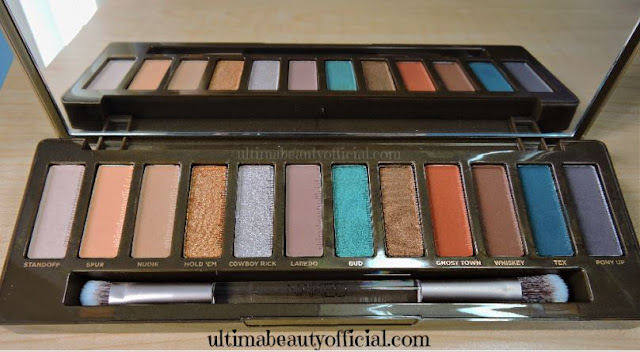
An excellently curated range of eyeshadows that have endless possibilities for all kinds of eye looks. You could go subtle with some of the bronze and brown shades or go more intense with the teal and deep taupe ones. I had so many ideas running through my mind, I didn't know where to start!
These shadows have three different finishes: matte, shimmer, and metallic.
So whatever event you are getting ready for; Zoom interview, rodeo, social-distanced date, or just a fun look for running errands there is a combination of eyeshadows in this palette for you.
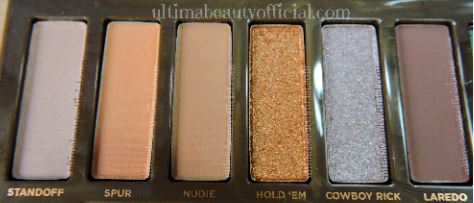
Standoff, Spur, Nudie, Hold 'Em. Cowboy Rick, Laredo
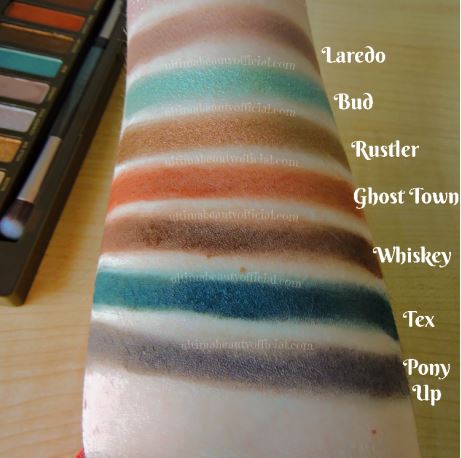
Bud, Rustler, Ghost Town, Whiskey, Tex, Pony Up
Swatches
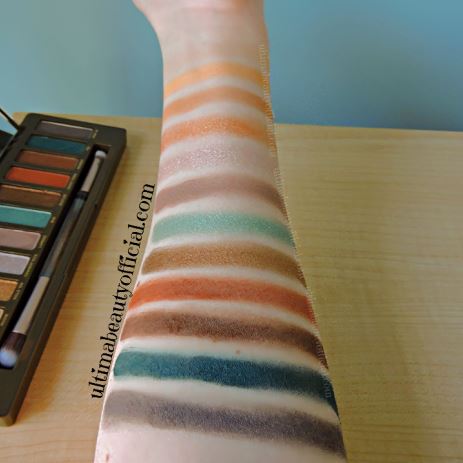
Now, here is a round up of Wild West swatches:
The lightest shade, Standoff, barely shows up on my skin, but works for a nice brow bone highlight.
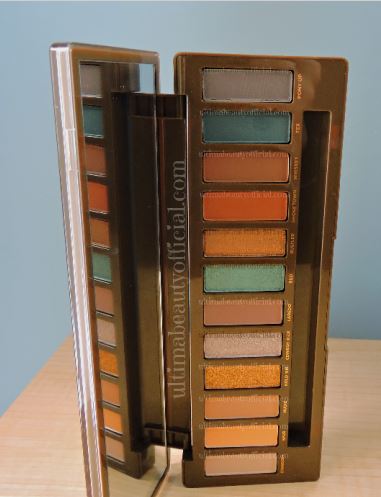
Very heavy on the matte shades, out of the 12 shadows eight have a matte finish.
Standoff - Beige, with a matte finish
Spur - Amber, with a matte finish
Nudie - Sandy Brown, with a matte finish
Hold 'Em - Bronze, with a metallic finish
Cowboy Rick - Soft Silver, with a metallic finish
Laredo - Rose Taupe, with a matte finish
Bud - Turquoise, with a shimmer finish
Rustler - Copper, with a shimmer finish
Ghost Town - Terracotta/Rust, with a matte finish
Whiskey - Russet Brown, with a matte finish
Tex - Deep Teal, with a matte finish
Pony Up - Slate, with a matte finish
Naked Wild West
Stats:
Formula: Pressed Powder
Fallout: Some
Blendable: Yes
Chalky/Flakey: No/No
Lasts for: 8-12 Hours
Pros: Super beautiful shade range with some lovely cool toned colors.
Extremely easy to blend - great for a fun smoky eye.
They are soft and buttery to apply and are crazy pigmented for true-color payoff.
Very flattering for all eye colors. I can speak personally that for hazel eyes; it's fabulous!
They last for eight hours without creasing without an eyeshadow primer, but with a primer they will last for up to 12-hours.
Cons: Some of the matte shades crumble a little in the pan.
There is some shadow fallout with some of the shades.
Star Rating: ⭐⭐⭐⭐⭐ (5 out of 5)
Would I Repurchase: Yes!
Final thoughts: Naked Wild West is amazing! I can't get enough of the shades and the textures are so wonderful to work with. There isn't too much fallout and it is easily cleaned up (check out my video). There are so many different eye looks you can create with this palette and the eyeshadows last all day.
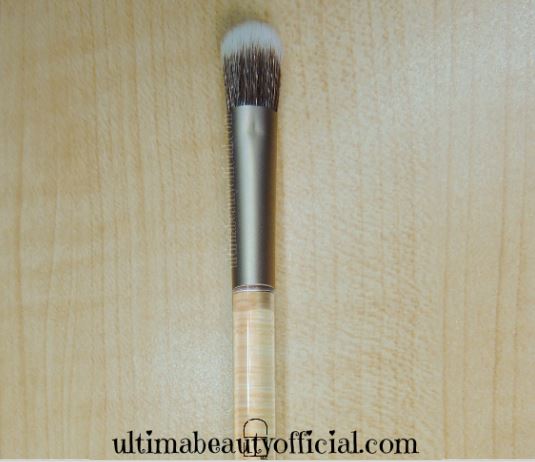
Brush
The shorter end is perfect for shading, placing, and building color in the crease and on the lid and lash line.
The opposite side is a fluffy blending brush perfect for blending and diffusing shadow placed in the crease or lash line by the shader end. It is also nice for dusting a highlight shade on the brow bone.
Tutorial
You can watch my video tutorial here
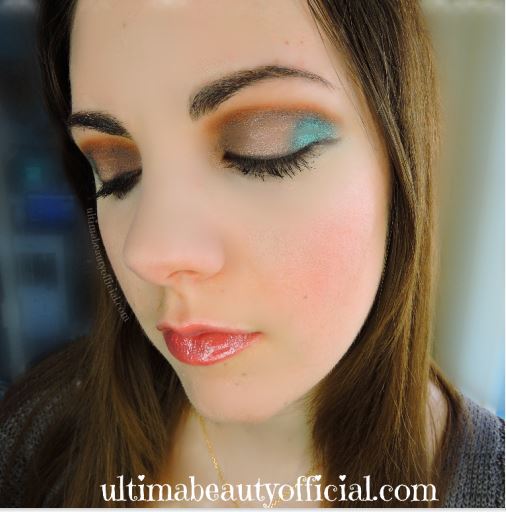
Here is a step-by-step tutorial of a makeup look I created using Urban Decay's Naked Wild West palette.
1. Primer, Whiskey and Blend: Prep eyes with an eyeshadow primer.
Take Whiskey (matte russet brown) and the short shader side of the brush that came with the palette and run it through the crease of your eye. Use a blending brush to soften and diffuse the shadow for a less harsh line.
2. Laredo & Cowboy Rick: Press Laredo (matte rose taupe) onto the inner 1/3 of your eye, then blend Cowboy Rick (silver shimmer) onto the center of your eyelid.
3. Tex, Bud and Blend: Next take Tex (matte teal) on a small eyeshadow brush and place it on the outer 1/3 of your eye lid, then blend the seams with Cowboy Rick and Whiskey. Take Bud on your ring finger and tap it on top of Tex for a shimmery effect.
4. Pony Up, Eye Pencil & Mascara: Trace Pony Up (matte slate) along the upper and lower lash lines winging it out just a bit. Run a black eyeliner pencil on the lower water line for extra depth.
Swipe a volumizing mascara on top and bottom lashes.
5. Standoff & more Cowboy Rick +: Sweep Standoff (matte beige) onto brow bone. Dust Cowboy Rick (silver shimmer) onto inner corners of eyes. Complete the look with a contour shade and highlighter, a blush, and lip gloss (you can see my products of choice below).
Which brings us to...
The beautifully saturated shadows blend perfectly together for a multi-dimensional eyeshadow effect.
There is a shade and finish for everyone's style and endless combinations that can be created from just these 12 eyeshadows.
The teal & turquoise shadows (Tex & Bud) are flattering on all skin tones and have a matte and shimmer finish, respectively.
Products I used:
Urban Decay: Eyeshadow Primer Potion
Urban Decay: Naked Wild West Palette
Urban Decay: Whiskey Eyeshadow
Urban Decay: Naked Dual Ended Eyeshadow Brush
MAC: 217 Blending Brush
Urban Decay: Laredo Eyeshadow
Beau Gâchis: Concealer Brush
Urban Decay: Cowboy Rick Eyeshadow
Tetris X ipsy: Tapered Blending Brush
Urban Decay: Tex Eyeshadow
Sonia Kashuk: Small Eyeshadow Brush No.7
Urban Decay: Bud Eyeshadow
Urban Decay: Pony Up Eyeshadow
Luxie Beauty: Rose Gold Mini Angled Eye Brush 131
Beauty For Real: Waterproof I-Line Eyeliner in Black Magic
Tarte: big ego™ mascara in Black
Tarte: Double Duty Beauty™ Shape Tape™ Concealer in N12 Fair
Neutral
Urban Decay: Standoff Eyeshadow
Complex Culture: Precision Eyelid Brush
Slmissglam: SS62 Short Shader Brush
NYX: Highlight & Contour Pro Palette
Beaute Basics: C405 Contour Blush Brush
Beau Gâchis: Illuminator (Highlighting Brush)
Lottie London: Ombré Blush in Serene
Luxie Beauty: Dreamcatcher Tapered Highlighter Brush 522
MAC: Little Lipglass in Love Child
MAC: Studio Fix Powder in NW10
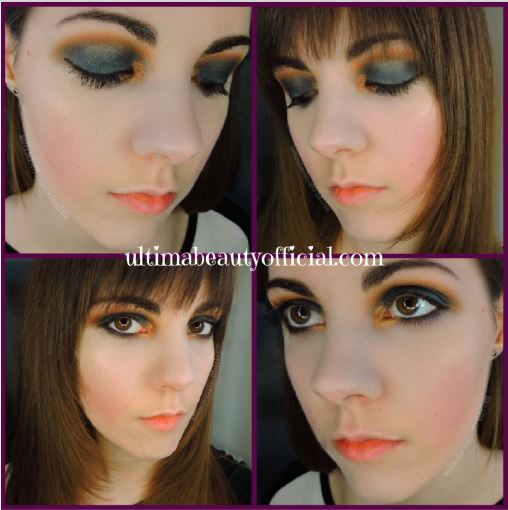
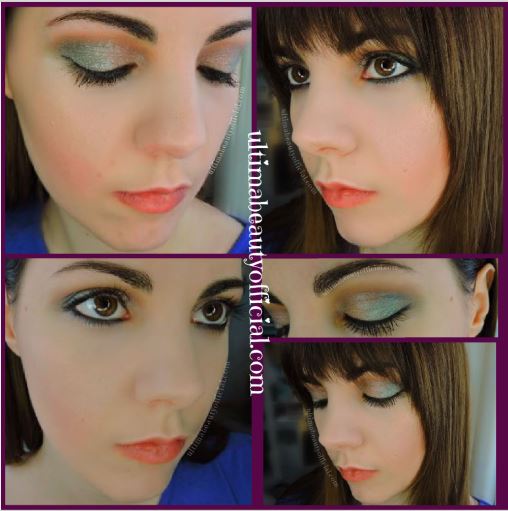
Here are a couple more makeup looks you can create with Urban Decay's Naked Wild West palette:
Tex on lid
Pony Up on lower lash line
Hold 'Em in inner corners of eyes
Bud on outer half of lid
Cowboy Rick on inner half of lid
Tex on lower lash line
And that is my review and tutorial of Urban Decay's Naked Wild West eyeshadow palette.
I am soooo pleased with this palette and I adore all of the shades.
It's been hit and miss for me with some of the Naked palettes, but Wild West is definitely a bullseye!🐮 Okay, I'll show myself out.
Thank you for checking out my post!
If you like tutorials & reviews subscribe by email so you'll get them delivered straight to your inbox.📬
Some other posts you might be interested in:
Thanks again for stopping by!
XOXO
Ultima Beauty












im not trying to be mean (its more constructive criticism) but if you want to attract more/repeat readers you should brush up on your skills and verbiage. When you want depth in an eye look you want to have lightest color from inner corner and darkest color on outter corner, to add true depth the dark color should always be a matte or satin color (never shimmer). Also you are dragging your eyes down and making them droopy because you are bringing that teal on the eyelid down below the lower lash line. Your "wing" is also angled down toward your ear and goes past the lower lash line. The wing should never EVER be angled down and below the lash line, it should be angled up toward the end of your eyebrow. Look at it this way...if you were to continue the black eyeliner on your lower lash and extend that line toward your temple (end of your eyebrow) there should never be ANY shadow exceeding that. Also, blending out the transition shade more so its not so harsh, same with the teal on the lid, its not blended with the silver. One more thing, the blush placement is very low,... in between your nose and your lips off to the side of your lips. Did you purposely mean to put the blush right there because that is also dropping your face down in the other two looks. First look its better but still way too low (Blusher should never exceed past the nostrils). I hope you dont take my comment the wrong way. Im trying to be helpful and honest. I would want the same if i had a beauty blog and my technical skills weren't quite right. That doesnt sound nice but i swear im not being mean, but as someone who went to school and studied makeup i thought it might be helpful.
ReplyDeletehttps://www.floraindia.com/flower-delivery/delhi.html A long time ago, someone decided that learning games - from the Commodore 64 all the way through to Wii educational games, today - don't need levels, leveling, or the standard video game staple: the end boss. This needs to change.
ReplyDeletehttps://www.oyegifts.com/flowers thanks forTutorial & Review
ReplyDeleteThe Urban Decay Naked Wild West Palette offers stunning, versatile shades for bold or neutral looks. However, just like fake payment spoofing tricks users with deception, counterfeit palettes can harm trust and quality. Always buy authentic products from trusted sources to ensure genuine beauty experiences—whether in makeup or transactions.
ReplyDeleteUnleash your boldest style with the Urban Decay Naked Wild West Palette—perfect for creating looks as dynamic as CarX Street Drive. Think desert-inspired shades for sunlit street vibes or smoky tones for night races. Blend, slay, and race in style as your makeup and car customization steal the spotlight! Read More
ReplyDeleteUrban Decay's Naked Wild West Palette offers bold, vibrant shades perfect for stunning looks. Just as this palette unleashes creativity, Traffic Rider Mod APK fuels excitement with unlimited money and uninterrupted gameplay. Both redefine experiences—whether crafting dazzling makeup or racing through highways, it's all about exploring limitless possibilities! Explore More
ReplyDeleteThe Urban Decay Naked Wild West Palette offers a stunning mix of warm and cool tones, perfect for versatile looks. In this tutorial and review, we’ll explore swatches and blendability to create a flawless eye look. Whether you prefer bold or neutral shades, this palette has it all! Just like finding the right exterminator Kanata, choosing the perfect makeup palette is all about quality and performance.
ReplyDeleteThe Urban Decay Naked Wild West Palette delivers bold, earthy tones perfect for standout looks. Just like beauty trends evolve, Pharmaceutical Manufacturing Equipment Suppliers adapt to industry demands, offering innovative, precise solutions for safe and efficient pharmaceutical production.
ReplyDeleteWebsite :- https://sterinoxsystems.com/pharmaceutical-equipment-manufacturer/